Flower Power (in your mud kitchen and beyond)

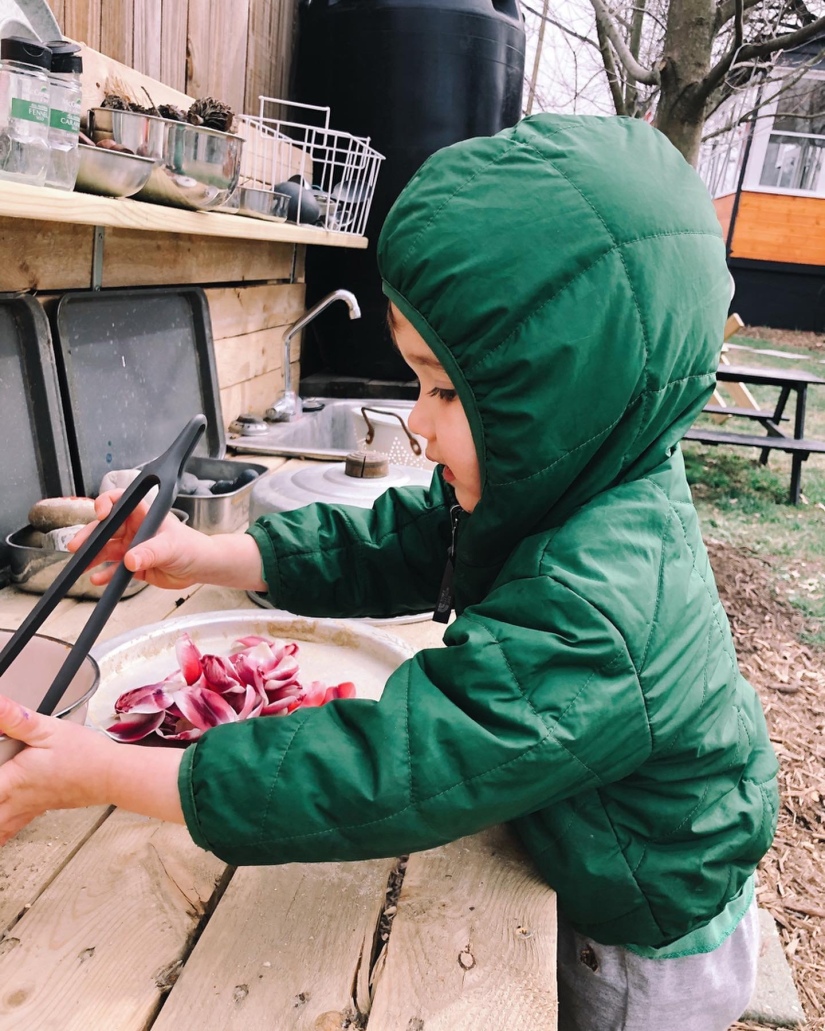
Did you luck out with a lovely bunch of flowers for Valentine’s Day? A week on they may be ready for the compost, but don’t be too hasty throwing them away. Instead pull off the petals and use them in your tiny human’s mud kitchen.

Don’t have one? No worries. Why not set up a little potion making/cooking station inside with the petals, water, and any other natural ingredients you can find. Worried about the mess? Use a towel as a tablecloth/rug to catch all the spills.

DIY Toy Picnic Basket | #inspiredbyCPS

We took down our tree today and packed away Christmas, with our eyes and hearts now firmly focused on the promises a new year brings. But before it’s all done and dusted, I had to repost this photo a dear friend shared my way. It’s her niece with the Christmas gift that was inspired by the work and ideas I share here. My friend thrifted the gorgeous picnic basket and all the fun accessories for it, and then topped it off with some cute Melissa and Doug Toys wooden play food. Can you even with how perfect this gift is?! Nothing makes me happier or prouder seeing what I do trickle out into the world in such beautiful inspiring ways. Keep tagging me, sharing your stories, and making my heart so full. And thank you for believing and trusting in me! x x

Loose parts in the sandbox | #unexpectedtoys

It was out with the mud pies and stews today, and in with ravine digging, ramp building, and car racing. Today’s #unexpectedtoys were wood offcuts and old bricks. I took cues from my oldest’s spontaneous play (ravine digging) and brought over some loose parts I thought might extend his play arc. They were met with enthusiasm, and with a little trial and error and lots of big ideas, my boys worked together to build a ‘car racing water slide’ that kept them busy alllllll morning! #winwin

⋒ Don’t have a sandbox? No worries. Loose parts like scrap wood and bricks make for great play anywhere outside (and they’re free!). Build fairy houses for small world play, obstacle courses for gross motor play, faux fire pits for dramatic play. Your child’s imagination has no limit!

Thrifting 101.

I love to thrift and I do it a lot. Thrift stores are 100% my happy place. Walking in feels exciting and like I’m about to embark on a treasure hunt. I never know what I’m going to find, but I usually walk out with something magical. However not everyone feels this way. For lots of folks thrift stores can feel overwhelming and like an endless cavern of crap, which let’s be honest, they kind of are – haha. But in this age of everyone needing to do their part for the environment, plus wanting to budget friendly, while also desiring an original ‘Insta-looking’ aesthetic, thrift stores are where it’s at! So at the risk of spilling all my secrets and everyone rushing out to buy all the treasures, I thought I’d share some hot tips on how to make a trip to the thrift feel a little more do-able.

  • First step is to go in with a plan. You obviously can’t shop for a super specific product, but you can go in saying I am looking for baskets with no handles to fit on my shelf, or I’m looking for animal figurines for small world play. This way you are focussed, can hit the specific aisles, and then can get out before you’re swallowed whole.
  • Be open minded. Sometimes you will find an item that with a bit of zhushing can meet your wildest dreams. I talk more about how to do that here.
  • In this same vain, don’t buy junk or broken things. It’s one thing to have to add some pom poms to hide a blemish, and the other to buy a toy or item that just looks like rubbish.
  • Think outside the box and look for unexpected toys and materials. I love the big section of bags filled with knick knacks and kitchen utensils.
  • Look at the electronics for old phones, keyboards, and joy sticks.
  • The linens for vintage crochet blankets and other fun old bedding.
  • Housewares for storage, from fun tins and containers, to wood bowls and baskets.
  • When shopping for toys, go in with a list so you don’t walk out with things you do not need. I have a list of certain toys I always look for. Don’t buy anything new until you have organized your child’s toys and inventoried what they really need.
  • Prioritize aesthetic! For example, when shopping for mud kitchen supplies, opt for the fun colorful or floral pot over the basic silver one. It might cost $1-2 more, but it’s so worth it for look and appeal.
  • Big mirrors are an amazing way to open up a space and make it feel larger, inside and out. Thrift stores sell them for super cheap! I love to spray paint old ugly wood mat white for a clean modern look. It’s worth the time and investment.
  • Always skim the artworks for pieces that would make your decor pop – I’ve found some amazing painted vintage mirrors and artworks in my many visits.
  • Go on sale days! Sign up for the free memberships and feel like you’re getting an even better deal than you usually are.
  • If possible, going during work hours (especially on sale days). It’s much less busy and overwhelming.
  • Take a snack and some water – sustenance.
  • If you take your kids, hit the books/toy section first and let them choose something to take home (my rule is nothing broken, nothing junky). This toy will then keep them entertained while you shop for your goodies.

And if all else fails, just hire me to do your shopping and treasure hunting for you! 🙂

Add a little personality to your play kitchen!

Want to vamp up your kids play kitchen to make it feel more personal and a little less plasticky? Hit the thrift store this weekend (or even better on their sale days) and treasure hunt some secondhand items for your tiny human. These are some of my favorite thrifted items from my boys’ play kitchen.

From L to R, top to bottom:

  • Salad spinner (this was one of my favorite things as a kid, and TBH after this pic was taken, Pilot discovered the newer clear much faster spinner in the basement and this little vintage yellow one is officially on the out).
  • Measuring cups
  • Folding sieve (these things are just cool)
  • Scale
  • Flour sifter
  • Fondu pot (these are always on the smaller size and often have pretty wooden handle and knobs)
  • Empty tins (vintage ones are so lovely)
  • Tongs
  • Food canisters
  • Cloth and hand towel (perfect for washing and drying dishes and hands)

Beverly + Sydney’s Mud Kitchen | October 2018

When your bestie’s small human has a birthday, you obviously need to go a little over the top. Beverly and Sydney live in a row house in DC with no backyard and a little front yard. Their mama really wanted them to have a place where they could play outside, so we dreamed up a little mud kitchen area for their tiny square of grass in the front. First step was removing/moving their two currently unused raised beds. One half was beginning to rot, so that came out. And then we scooted the other bed closer to the road to make a tiny spot to play.

Back home my beautiful beloved front yard bench had finally given up on life and fallen completely apart. I hated to throw it away and had held onto it more some kind of up-cycling, and then *voila* realized it would make the perfect mud kitchen, and we could make it look gorgeous and not in anyway an eyesore from the road.

BEFORE

IMG_4337

My lovely husband who does all the building and installing for this little venture, removed the old broken seat, replaced it with a new wood top using scraps, tightened everything up, added a shelf, and gave it a nice sand down. All with an adorable helper or two at times. 😉

The finished product came out better than I could have imagined and is a huge hit with the girls (and my kids). We furnished it out with a fun variety of pots and pants and other kitchen bits and pieces, plus lots of natural materials we had been gathering for them (rocks, acorns, sticks, feathers, other seeds etc). There are hooks to hand things (rope included), a place to park their dump trucks, and we up cycled some old slate paver pieces we found in our yard to help really designate the space. The mud kitchen also happily right near the spigot, so Beverly and Sydney can add water to their play when needed.

AFTER

Processed with VSCO with kk2 preset

A Mud Kitchen for a Nursery School |May 2018

The beloved nursery school Atlas went to for Pre-K was in need of a mud kitchen, so obviously I volunteered us to make one for them (I can’t help myself). Cue gathering all the scrap wood we own (plus outsourcing a sink and scrap from another co-op family and some bits and bobs from the school too), and coming up with a kick-ass design. Some of the key elements included:

  • A large enough workbench for multiple friends to play at, and a height that children of different ages could use it successfully.
  • A sink/place where water could be added and used.
  • Storage – shelving and a place where hooks could be hung.
  • Made from as much reclaimed parts as possible – for the look and the environment.

In Progress

Installed At School


UPDATE… In the year since it was built and delivered, TPCNS has made it their own 1000 times over. It has become a beloved well-used part of their play space and it’s so exciting to see it pop up on their Instagram feed every now and then.