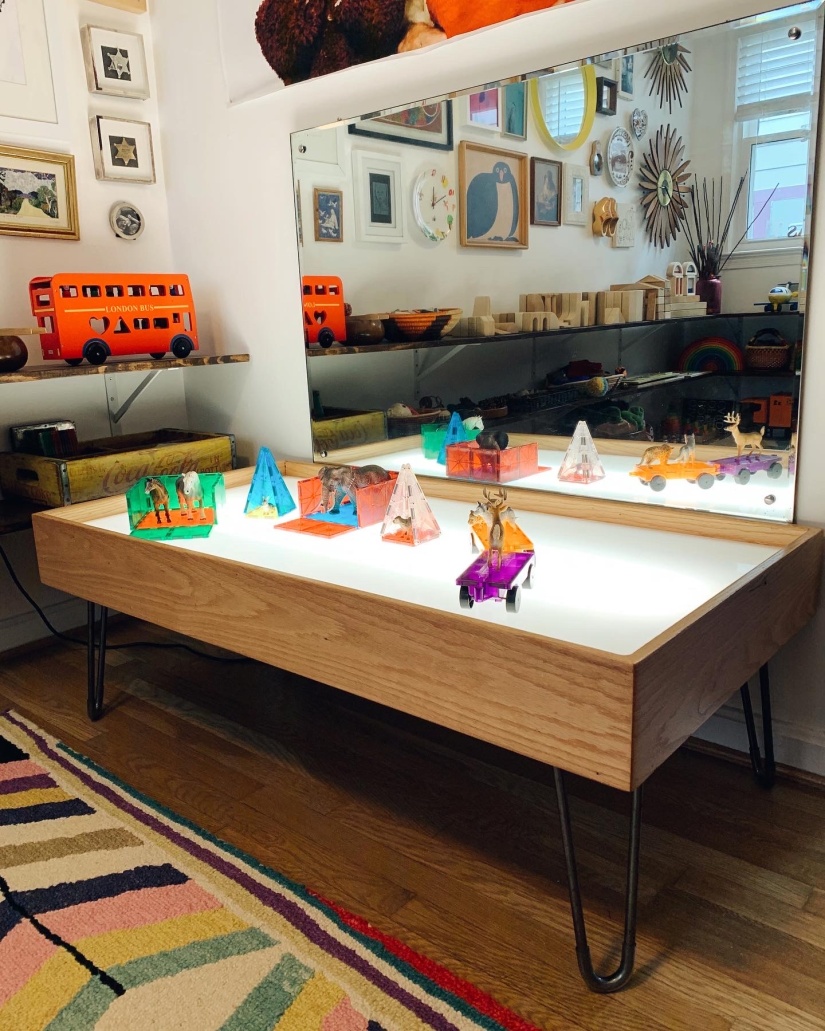
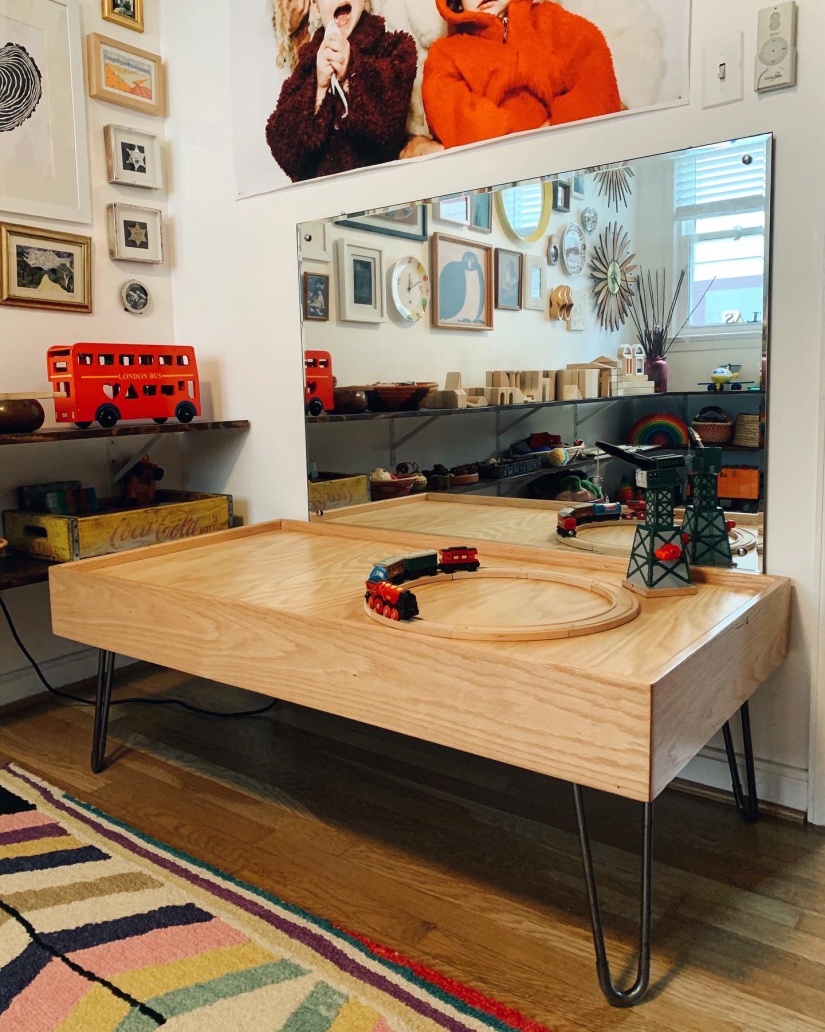
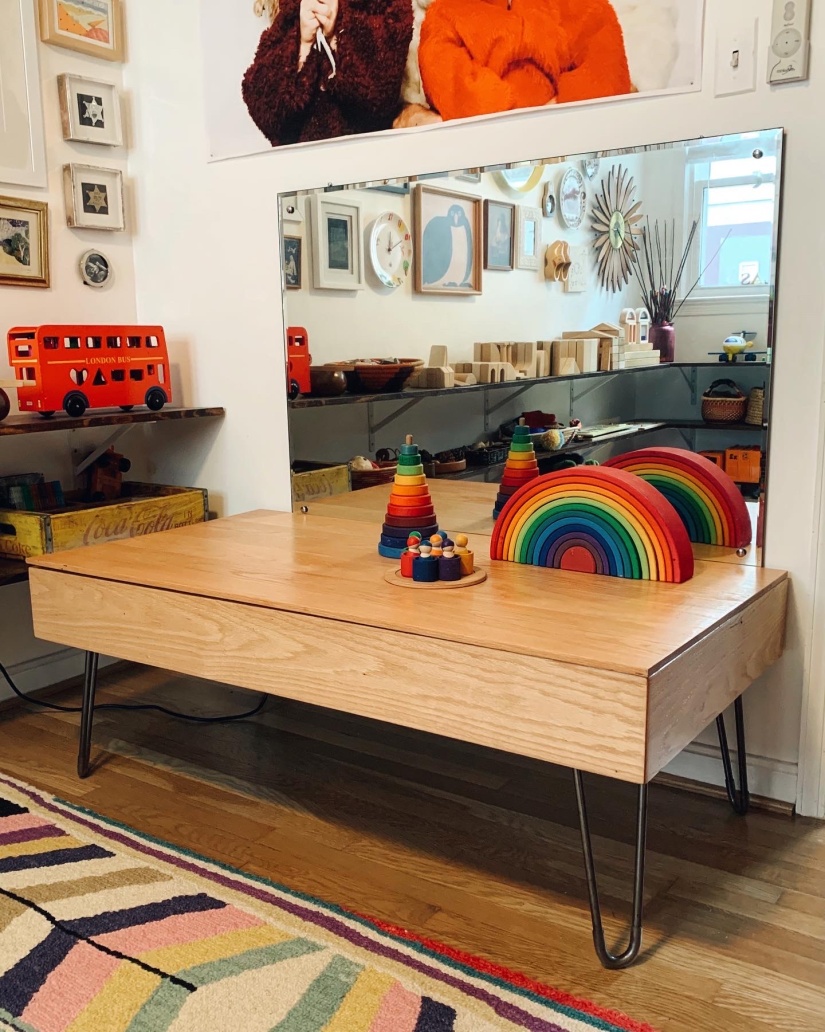
DIY combo light table/train table/coffee table (aka, the furniture dream).

c0b8cab5-d801-4296-92a1-ed01dc1f2b3b
Light Table
f31eb521-3d95-4f48-9794-0ec7c339d997
Train/Play Table
e3144cda-12e6-4a52-bae0-d1328d3d49a3
Coffee Table

I am forever getting these big ideas, so it’s rather lucky that I am married to someone who is willing to make them a reality. Case in point, when our oldest was a baby I decided he had to have a light table, that also doubled as a train/play table, and that we could also use as a coffee table. It needed to be beautiful and affordable to make too. Easy right?

With lots of planning, some tool lending from friends, and lots of tweaking to get the lights just right, my darling wonderful husband built me this! Four years and another baby later, it still gets used daily. The light table element is definitely the most popular layer, but it is used in all its iterations. Don’t you kind of need one now too? 🙂

Sharpen those pencils! | #curatedpsa

Play space #PSA: Keep your children’s pencils sharpened! Splash out on an electric sharpener and I guarantee your kids will fight over who gets to do it. Remember the materials you set out for your child are play invitations. You can’t expect your child to want to sit down and engage in art if the tools you put out for them are subpar and broken. Spend a minute each day checking your child’s art materials to make sure pencils are sharpened, markers have lids on and are working, glue isn’t empty etc. Value their work and play and they will learn to value themselves too. It really is that simple.

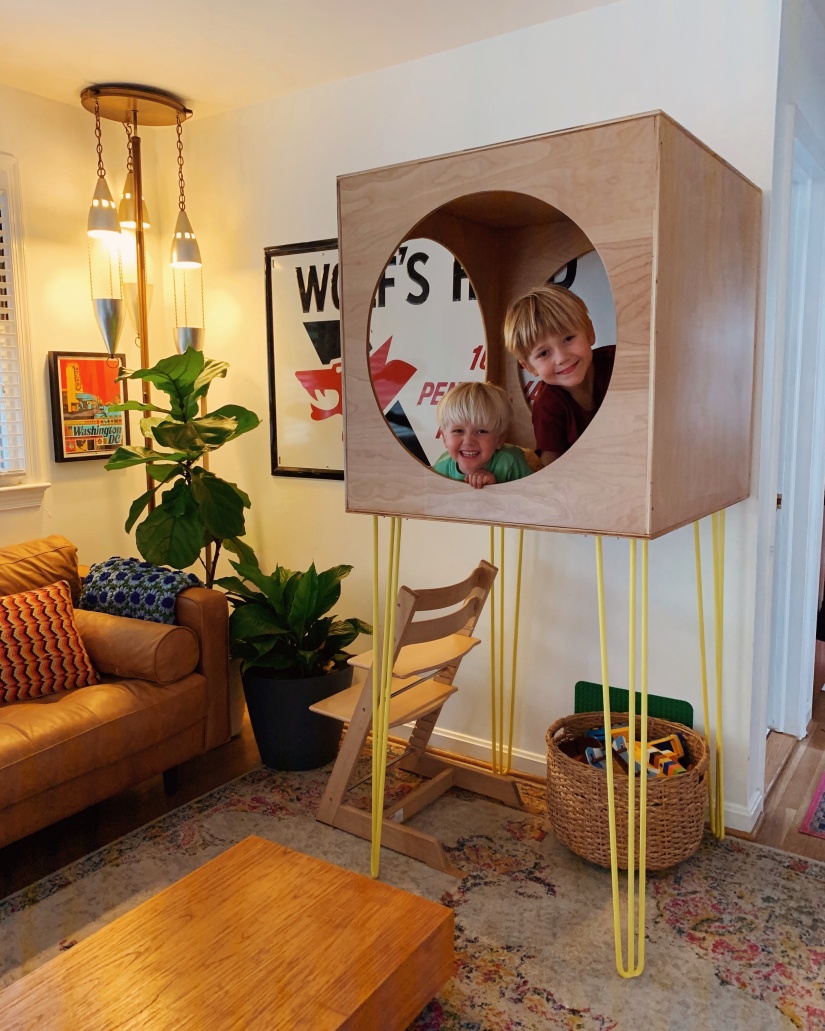
An indoor cube ‘clubhouse’ (as my boys like to call it).

Processed with VSCO with kk2 preset

A couple of years ago my lovely husband built this cube for our boys for Christmas. They ending up only wanting to play on top of it, so it was relegated to the basement. Fast forward to now, and while working on building a bookcase for a family using fun legs from DIY Hairpin Legs, I had the happy thought that our boys would love the cube if it was lofted vs sitting on the ground. So I bought some fun super tall hairpin legs for us (our house is tiny, so the space under it needed to still be usable too) and voila, this magic happened today. A ladder* still needs to be made, but for now our trusty Tripp Trapp chair by Stokke works perfectly.

*update – a ladder has been made, hooray!

It’s The Little Things (but like, really…)

Just a little in the moment PSA while I thought about it. Jars. They’re super useful and it always feels good to reuse vs throw them away. I love me a good pretty jam jar for art supplies or storing materials in for the play kitchen. But here’s the deal folks, you’ve got to remove the label properly. Unless you’re keeping it intact for play kitchen purposes, do not partially scrape it off and then call it a day. Aesthetically it is awful. To touch it is awful – so sticky. And it just catches dirt and dust. You wouldn’t want your lovely things displayed in something that, let’s face it, looks like rubbish, and neither do your kids.

Go that extra step and soak/scrub that puppy off. Still sticky? Invest in a product like Goo Gone – it will change your life AND remove all that icky gunky glue. I use it all the time to remove the tape and price tags from things I thrift, to remove the labels from bottles before I make bottle babies, as well as to remove the glue from jar labels.

Side note – here’s a link to some other DIY sticker removal ideas for those who prefer not to buy plastic/use chemicals.

Remember to think about your children’s environment as the third teacher and be thoughtful about the materials you add, including the storage vessels. This idea is a staple of the Reggio Emilia approach, the philosophy I was inspired by when teaching and that still permeates into the work I do now.

Bottle Babies | #unexpectedtoys

Bottle Babies*!

What are they? Plastic bottles filled with colored water and (in this case) glitter, with the lids super glued closed.

What are they for? Whatever your child wants to do with them. They are great ‘heavy work’ for kids who need that extra sensory input – moving them around from place to place. They are beautiful when the sun hits them. Use them as potions in dramatic play. Pillars in the sandbox when building a castle. Sauces for the mud kitchen.

They are a wonderful open-ended material/toy that is practically free to make. Opt for attractive bottles vs your average plastic soda bottle (I used Califia Farms milk bottles for these ones). Think of your environment as the third teacher – you want what’s in it (inside and out) to be visually appealing so it draws your child in to play!

*Thanks to my son’s preschool for teaching me all about them. 🙂