The ‘Thoughtbarn’ Playhive you’re going to NEED!

Processed with VSCO with kk2 preset

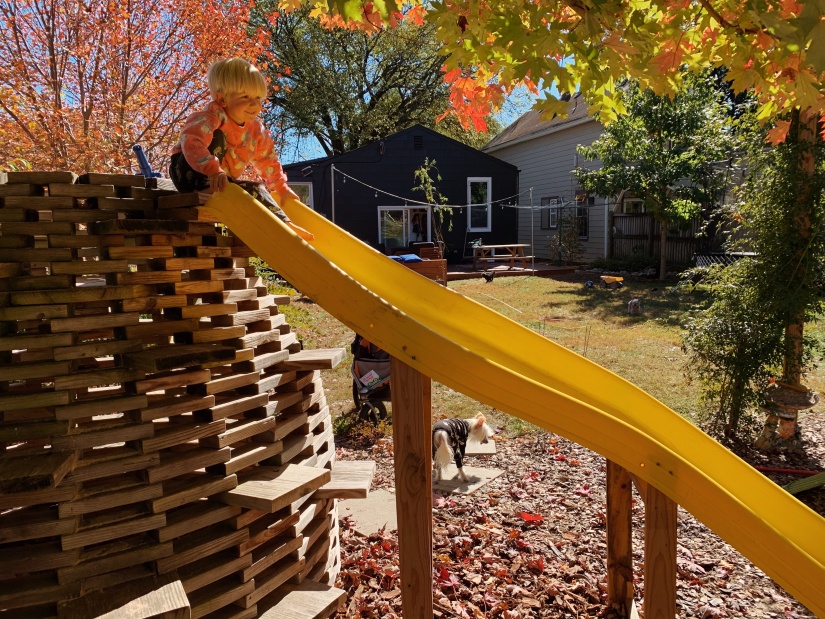
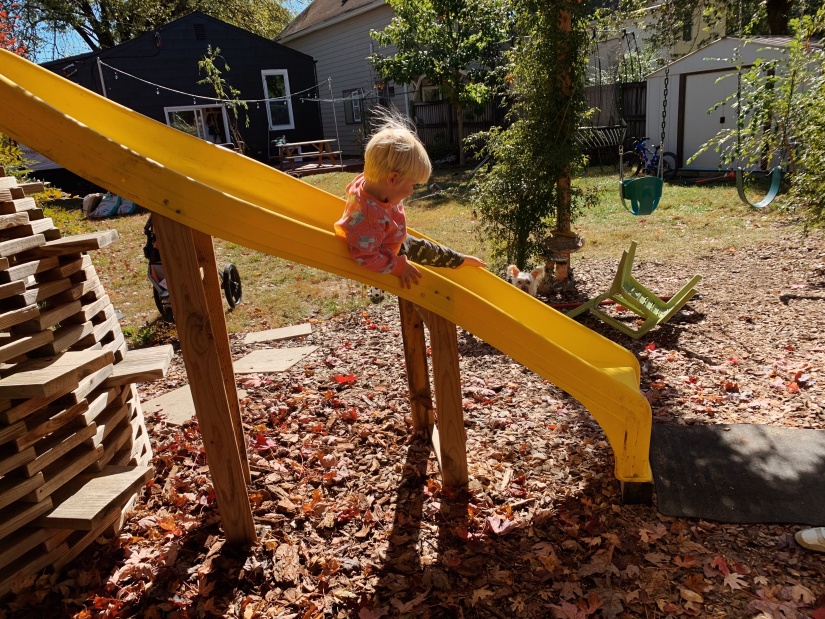
Many many years ago before we had kids, I discovered Thoughtbarn’s amazing ‘Playhive’. It was love at first sight and I always dreamed of building it at one of the schools I worked at. Fast forward to life as a mama at home with a toddler and I decided that now was the time to make that dream a reality for us. Enter my lovely husband who makes all my crazy dreams and aspirations come true, a few months of tacking away at it (because every single piece needed to be cut and sanded by hand) and finally we had our very own Hive. And the best part – you can build your own too, because Thoughtbarn is insanely rad and shares the plans for FREE! Download them HERE.

Update – over the years we decided to pimp out our Hive a little, by adding a slide and also most recently a play telescope. This created new invitations to play and has revigorized how our boys and their friends use it.

Processed with VSCO with kk2 preset
Processed with VSCO with kk2 prese

Building a Family Play Space | #mylittlehome

Processed with VSCO with a6 preset

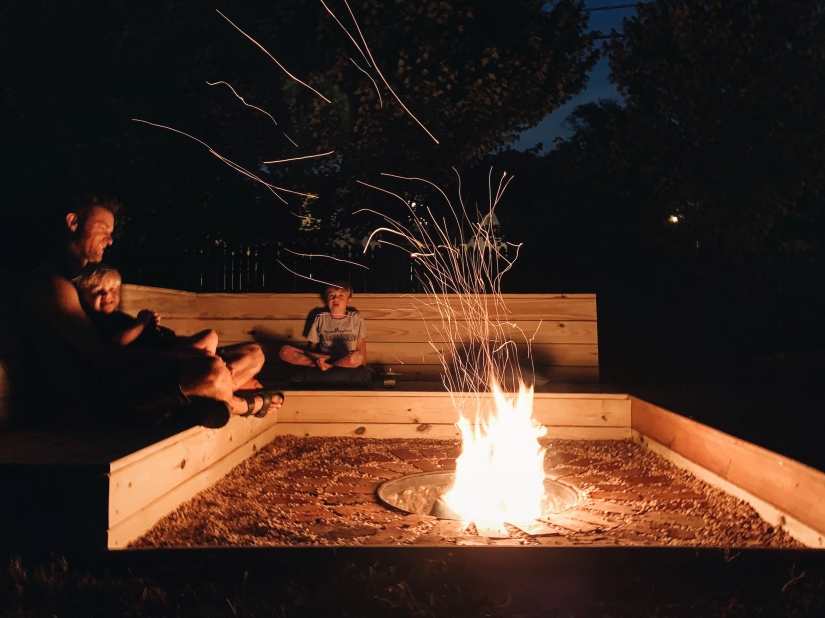
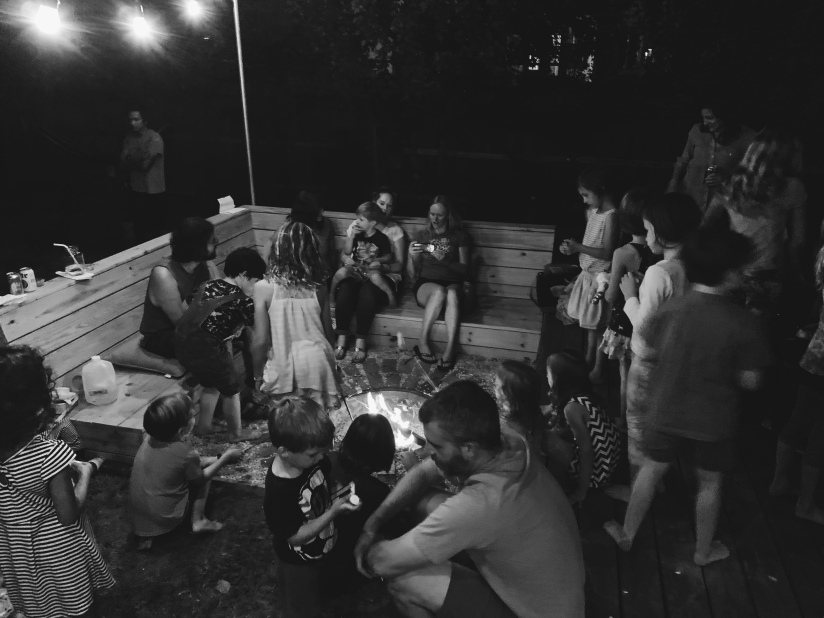
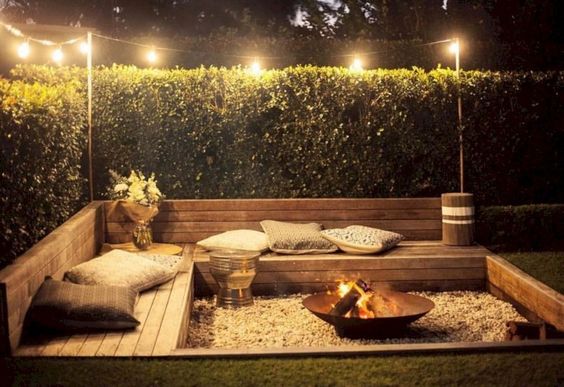
With the arrival of autumn and my birthday rolling around again, I decided my wish for the year was the creation of an outdoor sunken fire pit with wrap around bench seating (that’s reasonable, right?). Our back and front yards have been created entirely with our children in mind, but I wanted something Thomas and I could enjoy and use without the kids. And a place where we could enjoy the outdoors together and with friends, even when the days and nights get colder.

When creating an outdoor play space plan for a family recently, I came across this fire pit design as an inspiration for what they could build. I loved it so much however, that I kept thinking about it and it was the inspiration for what we built (or I guess I should say, what Thomas built). While perhaps not what I would typically call a play space, I wanted to include it on this blog because creating spaces for the entire family to enjoy together is so important too!

Unlike most of our projects, we bought new wood vs reclaimed for it (we just needed a lot and very definite pieces, plus we wanted it to feel like a seamless extension from our deck vs an add on).

My hope was that we could build it in a weekend (ha!), but the digging down in very hard dry soil took hours and hours, and honestly these things just take time. However two weeks later, after lots of late nights after work and continentally tacking away at it, we have a finished project! It will be stained in the coming weeks now the wood has dried out, but until it is getting quite a lot of use!

Processed with VSCO with b5 preset

The inspiration photo (source unknown)…

3d1bec982c0041963ab9a316d4a38f2c

An Outdoor Play Space Plan for a Family of Seven | July 2019

I was hired by the loveliest family to create an outdoor play space plan. Their children’s ages ranged from teenagers to still in utero, and they were desperate to create a place in their backyard for everyone to be able to enjoy. The husband in the family is super handy and able to do all the work, so they just needed help with the vision. After a visit to their home, we mapped out the section of garden we were going to use for the space and I got\ work. It was really fun researching and spending too much time on Pinterest 😉 to come up with the perfect set-up.

Their backyard BEFORE

In the end I created a plan and detailed document, laid out with photos and suggested materials etc. I wanted to share just the design sketch here to give you an idea of what we did. Drawing may not be my greatest strength, but this along with a detailed breakdown of what they should do, has set them on their way. I am getting regular updates on the projects and it is looking amazeballs!

img_0852

CURRENT update from the family (September)…

20190928_093758.jpg

Sandbox/Mud Kitchen feeling neglected? Just add shade and water!

Our little mud kitchen and sandbox area wasn’t getting much love recently, so I decided to spice things up to entice little friends back in. Step 1) adding some permanent shade over the sandbox with a $25 shade sail from Amazon. Step 2) water! The kids play area is as far from a spigot as possible, so I found a secondhand rain barrel for the area. After a good clean, we popped it on a little table so the faucet was easily accessible, and filled it up with the hose. Voila! And instant water source for my boys! It was a MASSIVE hit and they played outside all morning engineering waterways and making stew concoctions. ☼

f00beb01-6e16-412f-a50d-1633b4da56f4

A Little Free Library Space Just For Kids | #mylittlehome

img_0853

When we bought our house six years ago, the backyard was a jungle of weeds, dead trees, and a dilapidated chainlink fence. Over the years we have transformed it, including very early on erecting a six-foot wood fence (because as much as I love my neighbors, I need privacy and to feel like I have my own oasis). We live on a corner and our home backs an alleyway, and so permitting wise we had to caddy corner the back corner of the fence. This left a little triangular section of garden outside our perimeter that needed something other than dirt and weeds.

Rewind again, and six years ago my dearest friend’s baby passed away during childbirth. As a way of honoring her son, she asked friends to give books away in his name. This led to her sister establishing library shelves of children’s books in places of great need, under the name ‘Charlie’s Books’. I decided I wanted to honor Charlie in the same way, so we created our own Little Free Library just for kids in this space.

Over the years the plants have changed and grown, and this year we decided to create bean teepee over the reading bench, but it’s always been space where the neighborhood kids and folks passing by on their way to soccer or the playground, can stop and read, take a book, or leave some to share. And although this may not be a typical play space, I wanted to share because it’s something you could build for your front yard too as a way to create a space for all the children in your neighborhood.

Beverly + Sydney’s Mud Kitchen | October 2018

When your bestie’s small human has a birthday, you obviously need to go a little over the top. Beverly and Sydney live in a row house in DC with no backyard and a little front yard. Their mama really wanted them to have a place where they could play outside, so we dreamed up a little mud kitchen area for their tiny square of grass in the front. First step was removing/moving their two currently unused raised beds. One half was beginning to rot, so that came out. And then we scooted the other bed closer to the road to make a tiny spot to play.

Back home my beautiful beloved front yard bench had finally given up on life and fallen completely apart. I hated to throw it away and had held onto it more some kind of up-cycling, and then *voila* realized it would make the perfect mud kitchen, and we could make it look gorgeous and not in anyway an eyesore from the road.

BEFORE

IMG_4337

My lovely husband who does all the building and installing for this little venture, removed the old broken seat, replaced it with a new wood top using scraps, tightened everything up, added a shelf, and gave it a nice sand down. All with an adorable helper or two at times. 😉

The finished product came out better than I could have imagined and is a huge hit with the girls (and my kids). We furnished it out with a fun variety of pots and pants and other kitchen bits and pieces, plus lots of natural materials we had been gathering for them (rocks, acorns, sticks, feathers, other seeds etc). There are hooks to hand things (rope included), a place to park their dump trucks, and we up cycled some old slate paver pieces we found in our yard to help really designate the space. The mud kitchen also happily right near the spigot, so Beverly and Sydney can add water to their play when needed.

AFTER

Processed with VSCO with kk2 preset

Eddie and Walter’s Play Space Makeover | July 2018

This play space makeover was all about organizing and cleaning. Eddie and Walter have some amazing toys and other resources, but everything was lost in deep baskets, out of place, spread around the house, and in total chaos. Their mum was overwhelmed and didn’t know where to start, so I came in and helped get her on the right track. They had everything I needed there, so I came armed with cleaning supplies, time, and my mini sidekicks to help get it turned around. I focused on four main areas in the end…

THE PLAYROOM

BEFORE

  • The space was crowded with too many toys and the deep baskets on the Kallax shelves meant that things were thrown in and lost in the ether.
  • The foam mat on the floor was working primarily as a dust/dirt collector.
  • The room also doubled as the kids’ clothing storage space, but the large dresser took up too much valuable play room.
  • The same went for the large armchair, which didn’t serve much purpose in the space except to house a watchful adult.
  • The artwork on the walls was years old and there were other things to mount that no one had had time to get up.

AFTER

  • I removed some of the unneeded furniture and then shifted around the furniture that was left to create more floor and counter space.
  • I sorted through all the toys and removed ones that were broken, gimmicky (think McDonalds toys), or not age appropriate (i.e. baby toys).
  • The newly sorted toys went back into baskets and were organized in the room by type to help create play areas and inspire play arcs.
  • Art supplies were placed out in the open near the newly introduced easel + work table to encourage art to happen.
  • An area on top of the shelves was created for Eddie’s STEM toys + Legos, out of the reach of baby brother Walter.
  • The foam tiles were removed and small rugs I sourced around the house  were added.
  • Old artwork was taken down and new organizational pieces put up – hooks for ukuleles, a hat rack, and a height chart (all things that were waiting to be mounted).

BEFOREIMG_1784IMG_1800 Continue reading “Eddie and Walter’s Play Space Makeover | July 2018”

Lily’s Play Space Makeover (outside) | June 2018

We finished Lily’s makeover by installing her outside mud kitchen. Originally the space beside the garage was an overgrown bare concrete slab. But with a little muscle to clean off a thin layer of concrete (thanks Eric) and expose some lovely pavers + a a good old sweep and pressure wash, it became the perfect spot for Lily to set up shop and play!

  • We created a mud kitchen for Lily using scrap wood and an old sink, which can double as a water play station by just adding a sink plug. I accessorized the kitchen with a variety of baskets, kitchen storage containers + utensils, filled with lots of greenery, rocks, water and sand. The perfect ingredients for all sorts of potions and fun.
  • On the walls we added an old mirror for visual effect and a chalkboard where Lily can draw and write out her recipes. 🙂
  • We used an old pallet to create a simple tree shape decoration, which will double as a trellis for a pot of climbing beans to grow up.
  • And finally we added bottle babies – a fabulous open ended ‘toy’ for strength building, color and light play, and pretty much anything else you want to use them for.

Annnnd of course my little assistants were on hand to help make sure the mud kitchen was in good working order before we left. 😉

BEFORE Continue reading “Lily’s Play Space Makeover (outside) | June 2018”

Revamp Your Sandbox

When you think sandbox, what comes to mind is probably some kind wooden framed box filled with sand and toys like buckets + spades, maybe some cars, sand moulds, and other things you get in those sand toy multi-packs.

These classics are fun and I don’t doubt kids love them, but it’s so easy to take your sandbox to the next level and really create a fantastic open-ended play space with multiple play invitations for your kids. Here’s some ideas how:

  • Look after your sandbox! Your outdoor place spaces should be treated with the same love and respect as your indoor ones. The sand should be raked and watered (if very hot/dry) so it stays fresh and inviting – no one wants to play in a dry dirty desert scape.
  • Find a way to store all your toys and materials when your kids aren’t playing in the sandbox. This will help things to last longer and it keeps your outdoor play space looking nice too.
  • Old pots, pans, and other baking supplies are fabulous tools/toys to encourage lots of cooking and potion making. Just like the toys you have inside, the less plastic closed-ended toys = the better and more engaged the play.
  • Replace your plastic shovels with real metal ones!
  • Get serious about your truck play and use vehicles that can actually dig and move the sand.
  • Think about adding some toys like animal figurines to encourage small world play.
  • Add an old mirror (if your sandbox is next to a fence) for added dimension.
  • Rocks are awesome! One side of ours sandbox is entirely covered in rocks of different sizes. These are not only used in the sandbox, but also as an added element to my kids’ play arcs (in and out of the sandbox).
  • Loose parts – we have baskets of loose parts around our outdoor play space with things like tubing, ropes, yard flamingoes, tools, safety cones bricks etc.
  • Water! If you have water restrictions, even just a little water added to the sand play can enhance the play. If you don’t have water restrictions, don’t be afraid to go all out. In the photos above my boys had the sprinkler going on the sandbox at a very low level. This completely changed the play and was the most compelling play initiation ever. Both my five and one-year-old didn’t want the play to ever stop!
  • Create a platform next to your sandbox which your kids can use as a building surface, staging area, or even just a place to sit (we built a triangular one onto the side of our wooden box frame and have storage underneath it).

A Mud Kitchen for a Nursery School |May 2018

The beloved nursery school Atlas went to for Pre-K was in need of a mud kitchen, so obviously I volunteered us to make one for them (I can’t help myself). Cue gathering all the scrap wood we own (plus outsourcing a sink and scrap from another co-op family and some bits and bobs from the school too), and coming up with a kick-ass design. Some of the key elements included:

  • A large enough workbench for multiple friends to play at, and a height that children of different ages could use it successfully.
  • A sink/place where water could be added and used.
  • Storage – shelving and a place where hooks could be hung.
  • Made from as much reclaimed parts as possible – for the look and the environment.

In Progress

Installed At School


UPDATE… In the year since it was built and delivered, TPCNS has made it their own 1000 times over. It has become a beloved well-used part of their play space and it’s so exciting to see it pop up on their Instagram feed every now and then.